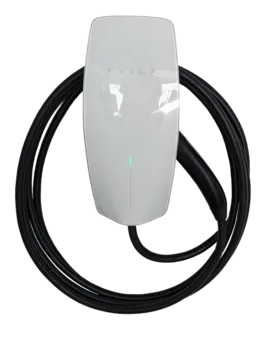
Troubleshooting Tesla Wall Connectors
Ensure your wall connector is connected to Wi-Fi
Connecting the Wall Connector to Wi-Fi
When the Wall Connector is first powered on it’s Wi-Fi network will broadcast for 5 minutes. If you haven’t connected during that time you can hold the button on the charging handle for 5 seconds or turn the breaker off and back on again to restart the broadcasting time.
Use your smart phone or tablet to connect to the SSID Wi-Fi signal which can be done by scanning the QR code on the quickstart guide cover page or by selecting the network you’d like to join and manually typing in the WPA2 password which is also found on the quickstart guide cover page.
With the device you used to connect to the Wall Connector direct your browser to 192.168.92.1 to access the commissioning interface. Follow the steps to assign the circuit breaker and connect it to your Wi-Fi network.
Tesla Charger Flashing Red?
No lights mean that it’s a power supply issue, there is no power coming from the breaker panel.
What to do: Verify that the power supply is turned on. If the issue persists, have an electrician remove the Wall Connector from the wirebox and confirm that voltage is present at the terminal block using a multimeter. Record the voltage readings for the following: L1 to L2/N, L1 to Ground, L2/N to Ground.
Solid Red means that there’s an internal fault. This could mean that the wall connector itself is bad and may need to be replaced.
What to do: Turn the circuit breaker off (should be labeled), wait 5 seconds, and turn it back on. If the solid red light remains, document the part number and serial number, then contact Tesla. You can visit www.Tesla.com/support/contact or give them a call at (888) 765-2489 or (877) 961-7652.
One (1) red blink means that there was a ground fault circuit interruption due to an unsafe current path.
What to do: Inspect the handle, cable, Wall Connector, and vehicle charge port for damage or signs of water ingress. Have an electrician check that the earth ground is not directly connected to a conductor wire in the branch circuit.
Two (2) red blinks mean that there was a ground assurance fault or a high ground resistance has been detected.
What to do: Contact an electrician to verify that the Wall Connector is properly grounded. The ground connection must be bonded in the upstream power supply for proper operation. Check all physical connections, including the wirebox terminals, electrical panel, and junction boxes. In residential power supplies, check the bond between ground and neutral at the main panel. If connected to a step-down transformer, contact the transformer’s manufacturer for directions on how to bond the ground connection.
Three (3) red blinks mean that a high temperature has been detected.
What to do: Check the faceplate and cable handle for excessive warmth. Have an electrician remove the Wall Connector from the wire box and verify that the conductors used are sized correctly and that the terminal block is torqued to specification.
Four (4) red blinks mean that the internet connection was lost so the online features are disabled.
What to do: Check for objects that could interfere with the area’s Wi-Fi signal strength. Confirm that the local Wi-Fi router is operational. If the Wi-Fi password was changed recently, follow the commissioning process on your mobile device to update the Wi-Fi settings.
Five (5) red blinks mean that there was a power-sharing communication issue so the charging speed has been reduced.
What to do: Check for objects that could interfere with the area’s Wi-Fi signal strength. Follow the commissioning process on your mobile device to re-link the Wall Connectors for power-sharing.
Six (6) red blinks mean there was an overvoltage or poor grid quality detected.
What to do: Verify that the power supply is nominal 200-240 volts. If the issue persists, have an electrician remove the Wall Connector from the wirebox and confirm that voltage readings are as expected at the terminal block using a multimeter. Record the voltage readings for the following. L1 to L2/N, L1 to Ground, L2/N to Ground.
Seven (7) red blinks mean that vehicle overcurrent has been detected.
What to do: Reduce the vehicle’s charge current setting. If the issue persists and the attached vehicle is manufactured by Tesla, record the vehicle’s VIN and approximate time of the fault and contact Tesla. You can visit www.Tesla.com/support/contact or give them a call at (888) 765-2489 or (877) 961-7652. If the vehicle is not manufactured by Tesla, contact the vehicle’s manufacturer.
Additional Assistance

*Note: All red blink codes pause for one second, and then repeat.
If additional assistance is required, having the following information prepared before contacting Tesla:
- Short video of Wall Connector LED activity during faulted state
- Photo of Wall Connector’s part number and serial (located on the side label)
- Timeframe that the issue was observed
- VIN of vehicle that plugged into Wall Connector at time of faulted state
- Photo of any error messages displayed on the vehicle’s screen
Visit www.Tesla.com/support/contact to request support. You can also call (888) 765-2489 or (877) 961-7652.